Contents
What is it?
The second iteration of this project is further documented on my band’s website, here. Improvements include smaller size and lower power consumption.
NESA is my own NES Audio mod based off the CMoy Pocket Amplifier with some very helpful advice from the NESdev forums, and the folks from XCSSA (Anton in particular for his advice on etching boards). It is designed to circumvent the standard audio path on the NES. There are a few reasons to do this. One, the audio output is quite noisy. Apparently, this is due to running the audio past the PPU on the NES. There are some software work-arounds though another reason for this mod is that I can record the various channels on the NES separately.
Audio Comparison
Here are some comparisons between emulation, NES, and the NESA mod. Unless otherwise noted, no changes were made to the original audio. Everything was done using a PowerPak. When using the NESA, the cartridge audio was muted since I do not output cartridge audio from the standard NES audio out. The recordings were done in Live and were routed through my regular audio mixer (which likely adds a bit of noise, though likely only a tiny amount).
Music
Here are 3 versions of song #6 taken from TSSF’s NES cover of MegaMan 10 (you can find the NSF at Zophar’s Domain. Since you cannot really hear the difference in unwanted noise, I added some panning to illustrate that one can now muck around with the audio channels independently. No effects were used for any of the recordings, other than the panning. I usually bump up the bass on the noise/tri/DPCM channel but opted to zero it out just for comparison-sake. Pay close attention to non-lead square as it sounds noticeably different in FamiTracker than on the NES. I almost suspect that might be a bug. Also note the drums as they tend to sound subtly different, though it is more noticeable with DPCM samples (of which I don’t have an example for at the moment).
FamiTracker: FamiTracker
Original: Original
NESA: NESA
Noise
Below are noise comparisons. I was able to take these by playing a song that had an end-point using the PowerPak. After that, I set my inputs to max basically and recording the result. Since the results were very soft using NESA, I then increased the output post recording to +18dB from original. It’s not an exact science but definitely illustrates the significant drop in noise by using NESA. I don’t have an oscope or anything to provide anything more specific. I thought about taking a pic of the waveforms taken from Live but, meh, I think this illustrates the point well enough.
NES Audio
NESA supports 3 channels, which is different from some of the other mods out there. The NES itself only outputs 2 channels off the 2A03 CPU (one pin outputs the two square-waves; and the other the triangle, noise, and DPCM). The 3rd channel is for cartridge audio. In my case it is mostly for thePowerPak. The PowerPak is able to emulate the extra sound-chips found on some of the Famicom titles. This is of course, useful when playing games off the PowerPak, but I wanted this option for songs I composed (using FamiTracker) that made use of these chips. Though these chips can be emulated in software, I liked the idea of using the PowerPak to keep things consistent. The PowerPak does sound a bit more grungy over just exporting the audio from FamiTracker and I tend to like that sound.
The 2A03 itself also sounds more expressive. One big difference I noticed was the noise channel. FamiTracker is just too pure and it’s emulation of some of the NES quirks is not totally perfect. Don’t get me wrong, FamiTracker sounds great but using a real NES just gives the result more depth. Plus it’s cool to say that the music I record was done using a real NES :)
In terms of audio quality, it sounds wonderful! How much of that is the op-amp and how much is just tapping off the 2A03 directly is hard to say. In fact, NESA may have been more than necessary for just recording audio off the NES. The NESDev forum post above includes some simpler alternatives. Nonetheless, the 2A03 sounds wonderful! Before using NESA, there was a noticeable buzz that was hard to ignore and the problem is that, when mastering audio, I may record 1 channel at a time. Using the standard NES audio out would multiply the noise. After NESA, I cannot hear any noise off my mixer from the 2A03. The PowerPak is different. Though much less apparent, there is still a small buzz in the audio of it. I am not yet sure if it will be bad enough to thwart recording but for listening it’s tolerable. Not much I can do to fix that since I suspect that noise is coming from the PowerPak itself.
Building It
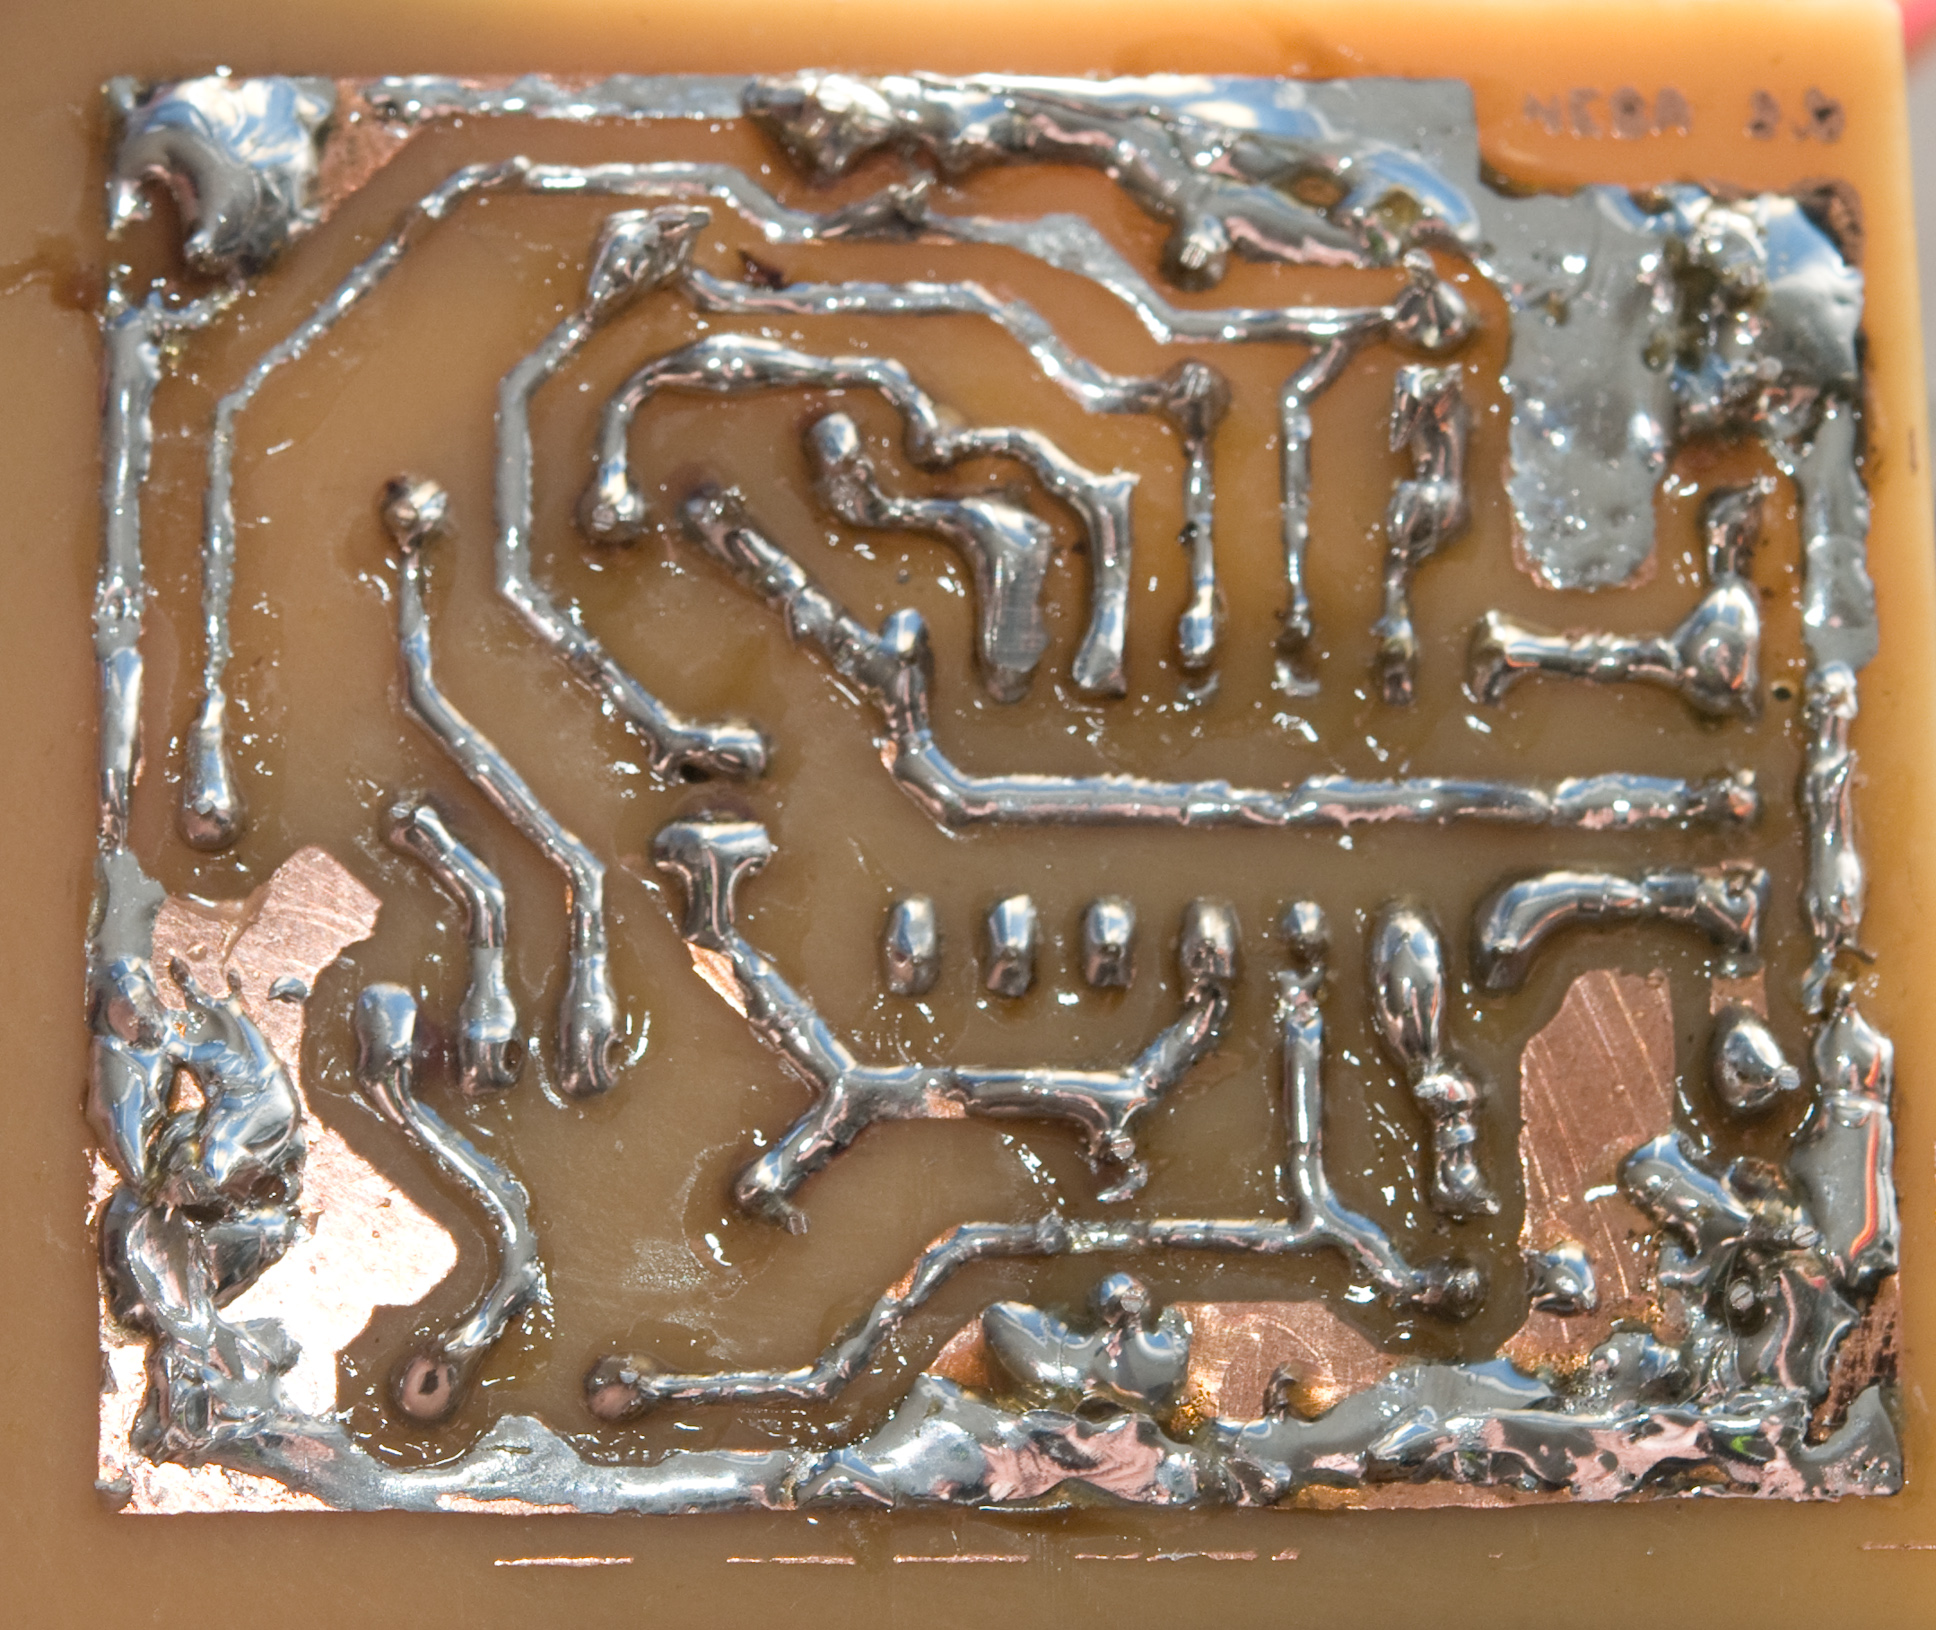
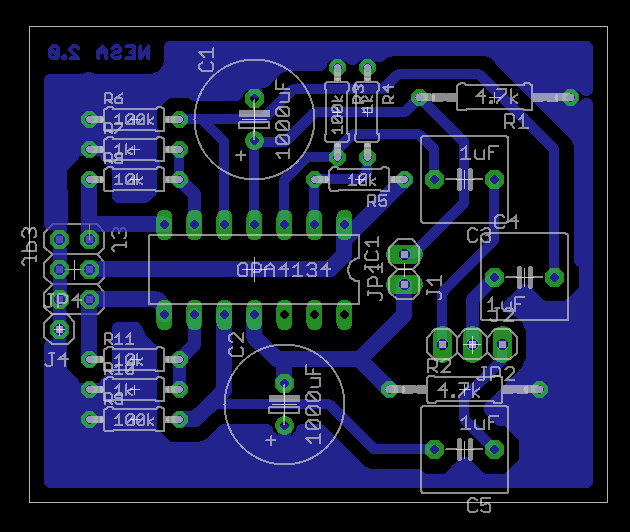
The PCB
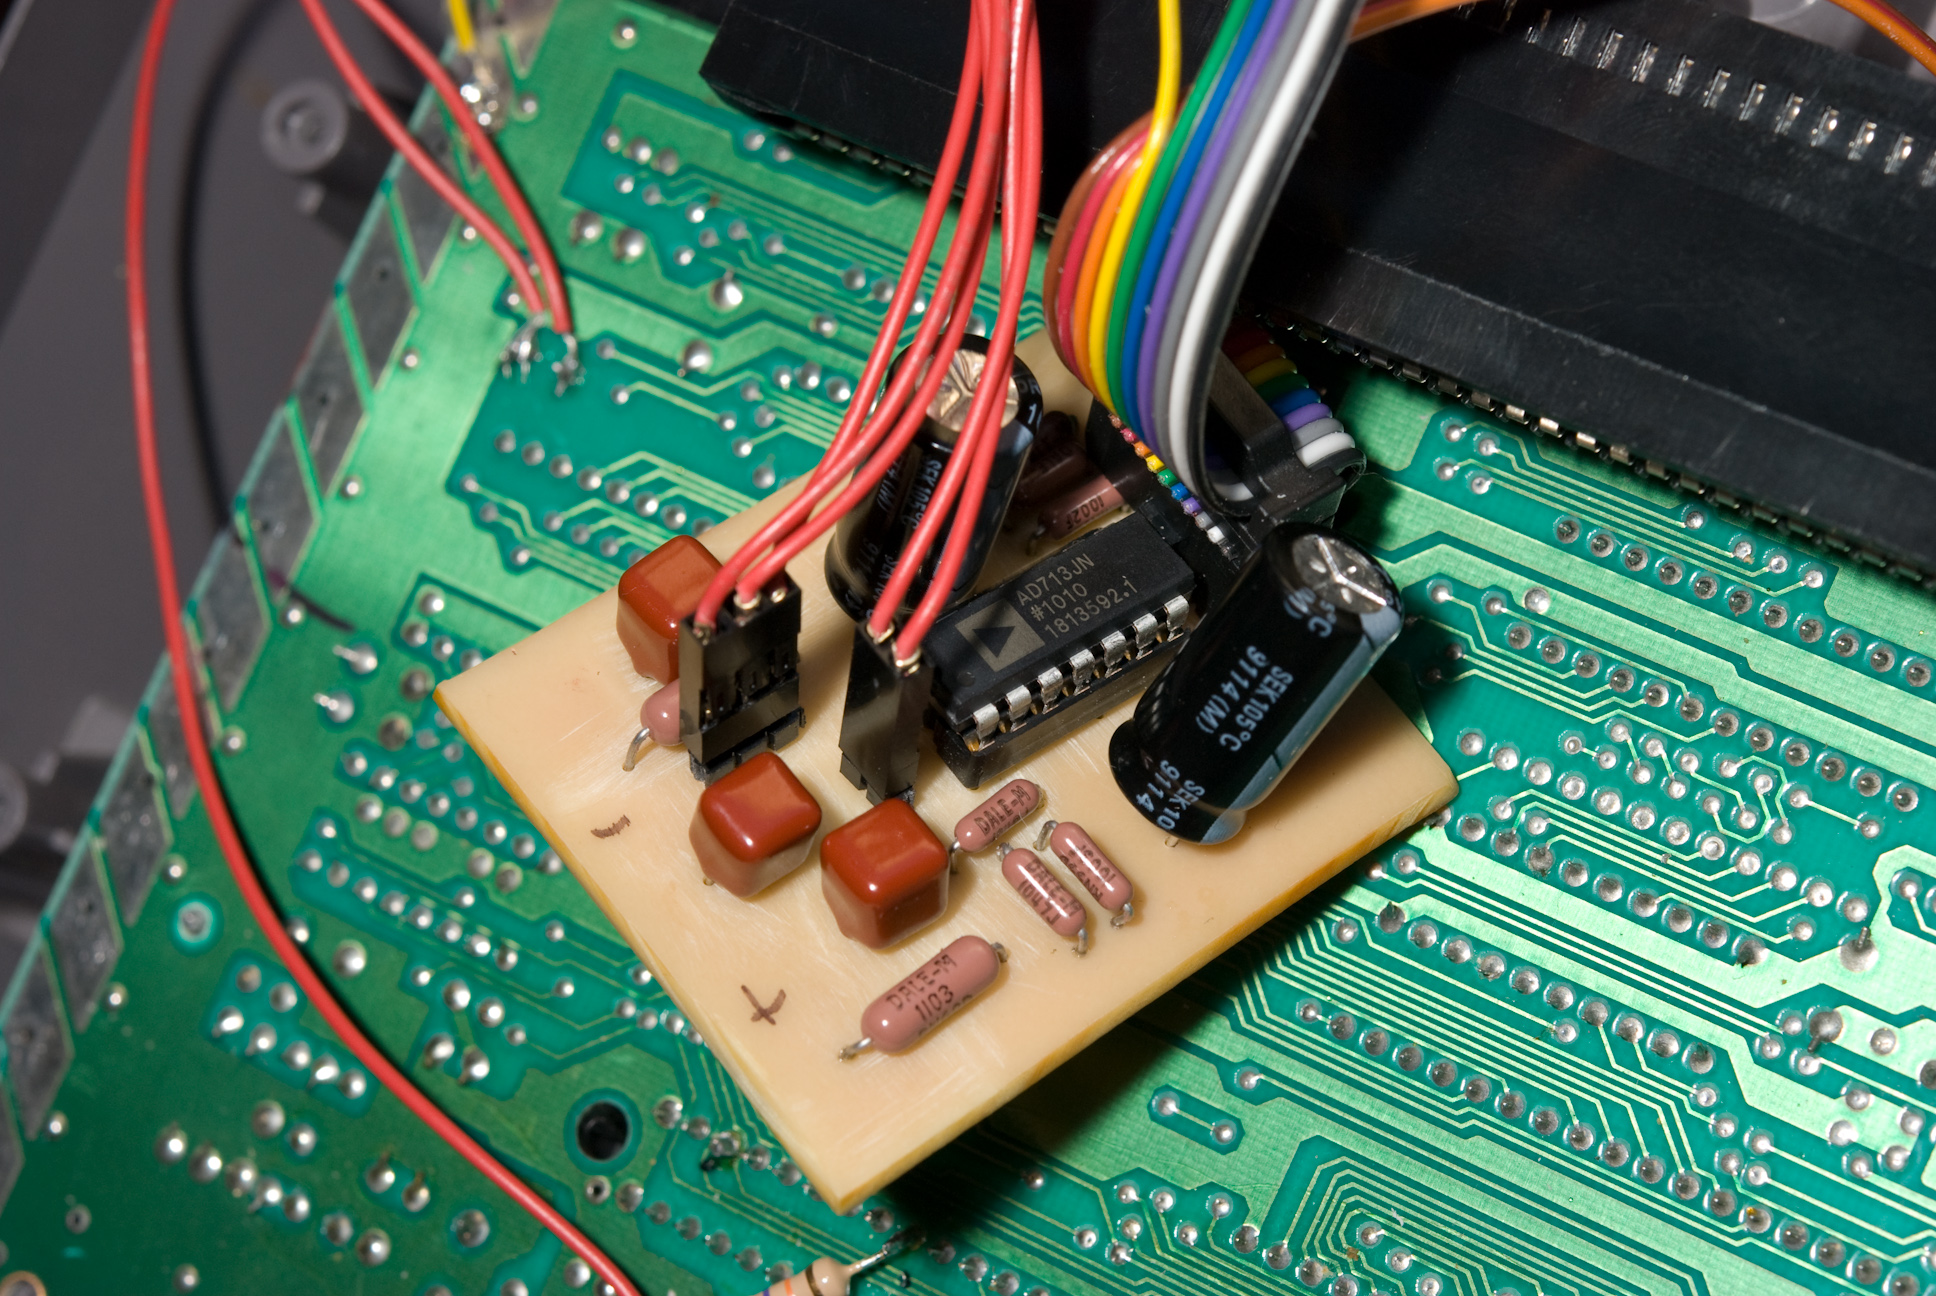
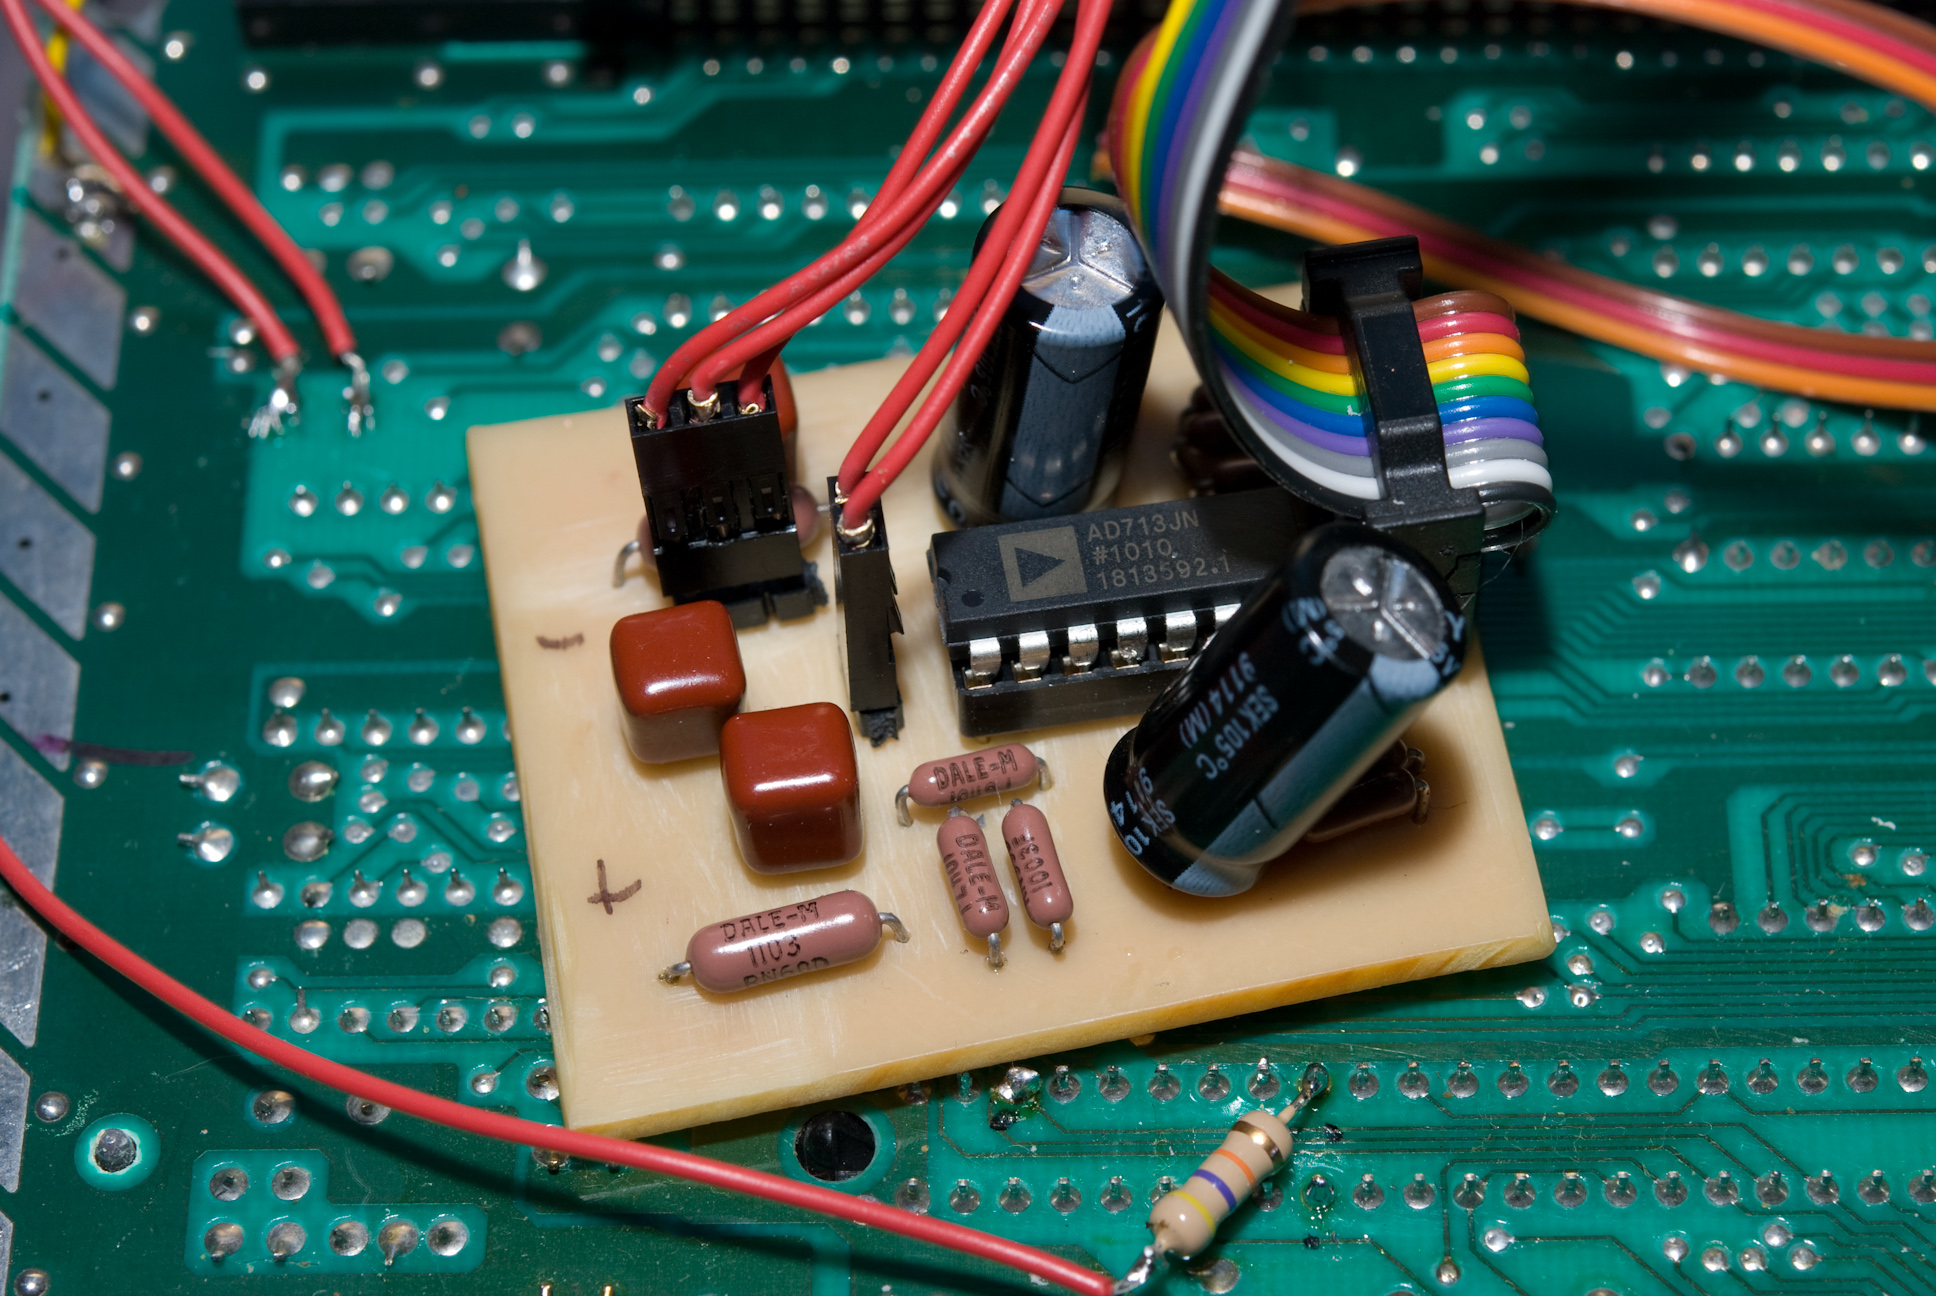
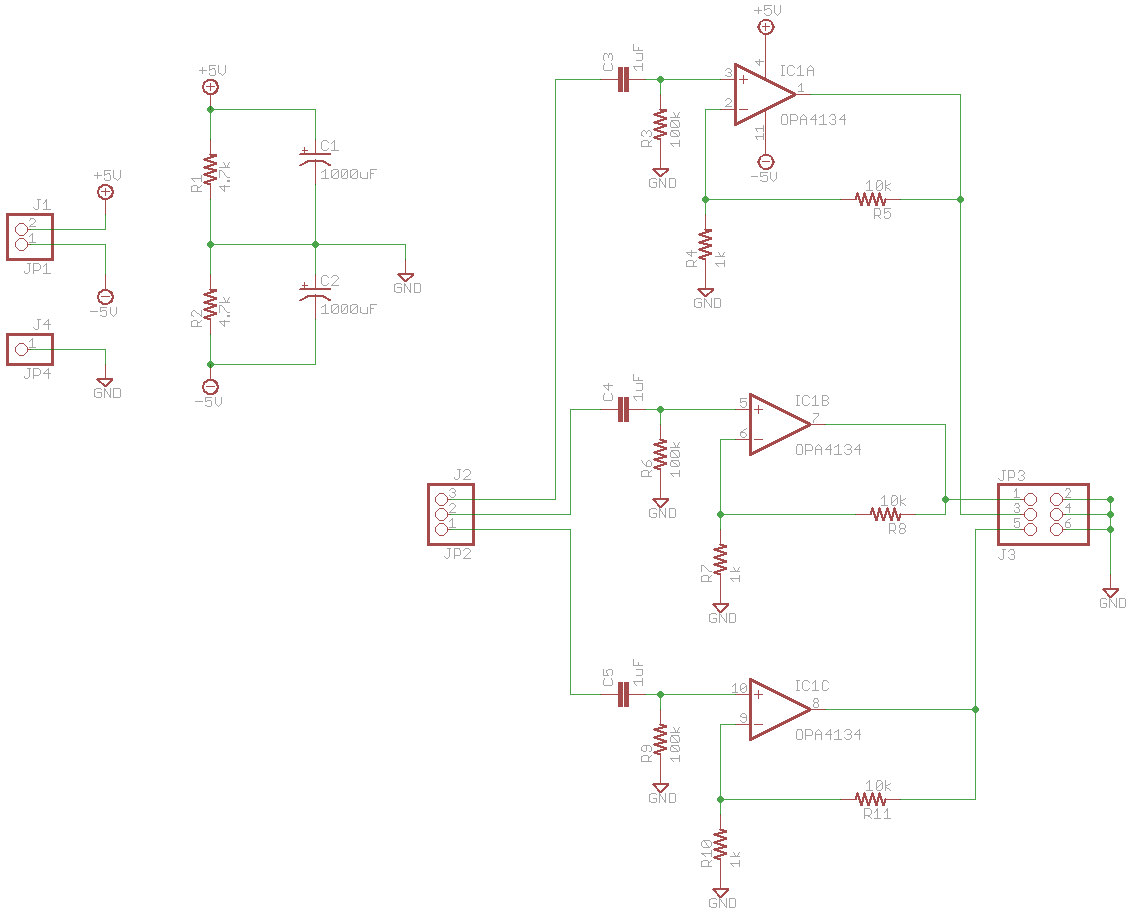
While it took a few tries, the NESA board is a single-layer board to make it easy to etch at home. Of course it can be printed by a fab shop (I prefer BatchPCB). I generally followed the CMoy specifications there in terms of capacitor and resistor values. The op-amp requires a bipolar supply which the NES cannot generate by itself though there may be some ways around that.
Power is supplied via the 2-pin connector. Watch the polarity! The 3-pin connector is for input from the NES and PowerPak/Cart-In. The 7-pin connector is the output plus GND. The 4-pin strip is all tied to ground. I did that to make connecting the phono jacks easier and used the extra pin for the GND from the NES.
Powering the amp
I preferred to use 9V batteries in series to power the op-amp. I mounted a barrel power jack, much like the one already on the NES, for the batteries. That means it is possible to power the amp using a DC supply instead. It should be a linear (non-switched) supply to avoid noise. Technically, one could power the NES and amp using a custom PSU, but that’s for another day. Either way, the op-amp runs at a minimum of 5V. Since there a voltage-divider is being used, that means a minimum of 10V is required.
Parts
I bought all my parts from Allied Electronics. The only items missing on the list are a DC jacks, phono jacks, 9V battery terminals, and hookup wire. Those can be had at Radio Shack. I ended up using a 10-conductor ribbon cable to connect the phono jacks, but the parts list includes parts to do it using crimp-style pins.
Note that the parts list below includes higher quality resistors and caps. You do not have to do that, but the instructions for the Cmoy amp indicated that it makes an audible difference – I have not tried it with lesser components than those noted below so I would not recommend worse substitutions without looking at the Cmoy docs first.
| Item | Part No. | Qty |
|---|---|---|
| 14 pin DIP socket | 374-4552 | 1 |
| Crimp Pin | 518-0053 | 12 |
| 2-pos Crimp Housing | 518-0250 | 1 |
| 3-pos Crimp Housing | 518-0251 | 1 |
| 8-pos Crimp Housing | 518-0272 | 1 |
| SIL Headers | 518-2401 | 1 |
| Analog Devices Quad Op-Amp | 630-0308 | 1 |
| 1000uF Electrolytics Power Caps | 852-7012 | 2 |
| 1uF Polyester Caps | 862-2154 | 3 |
| 1k Resistors | 895-0898 | 3 |
| 10k Resistors | 895-0355 | 3 |
| 100k Resistors | 895-1217 | 3 |
| 4.7k Resistors | 896-5991 | 3 |
Total Cost: $22.00 (not including shipping)
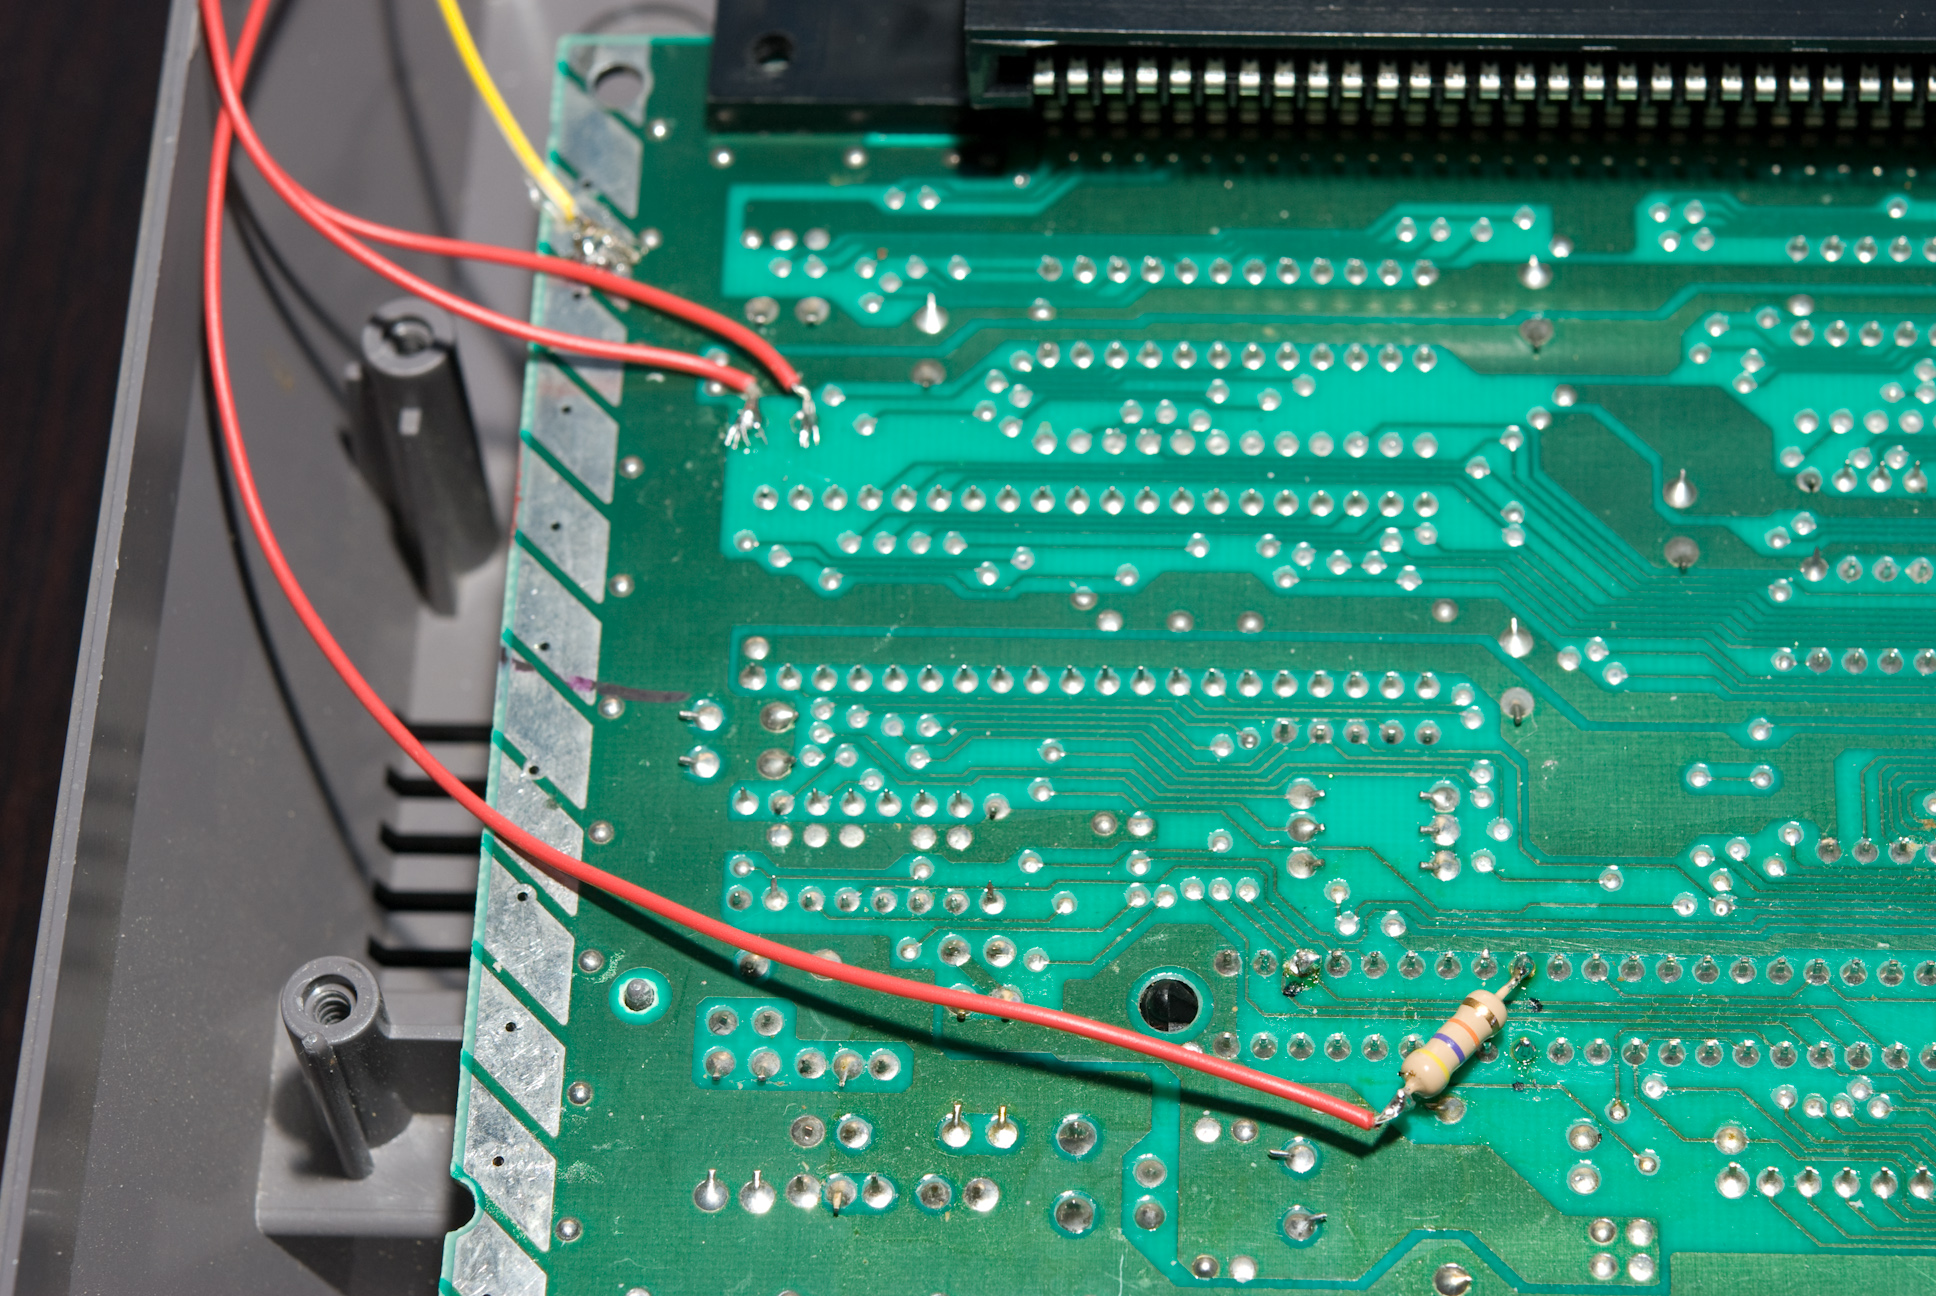
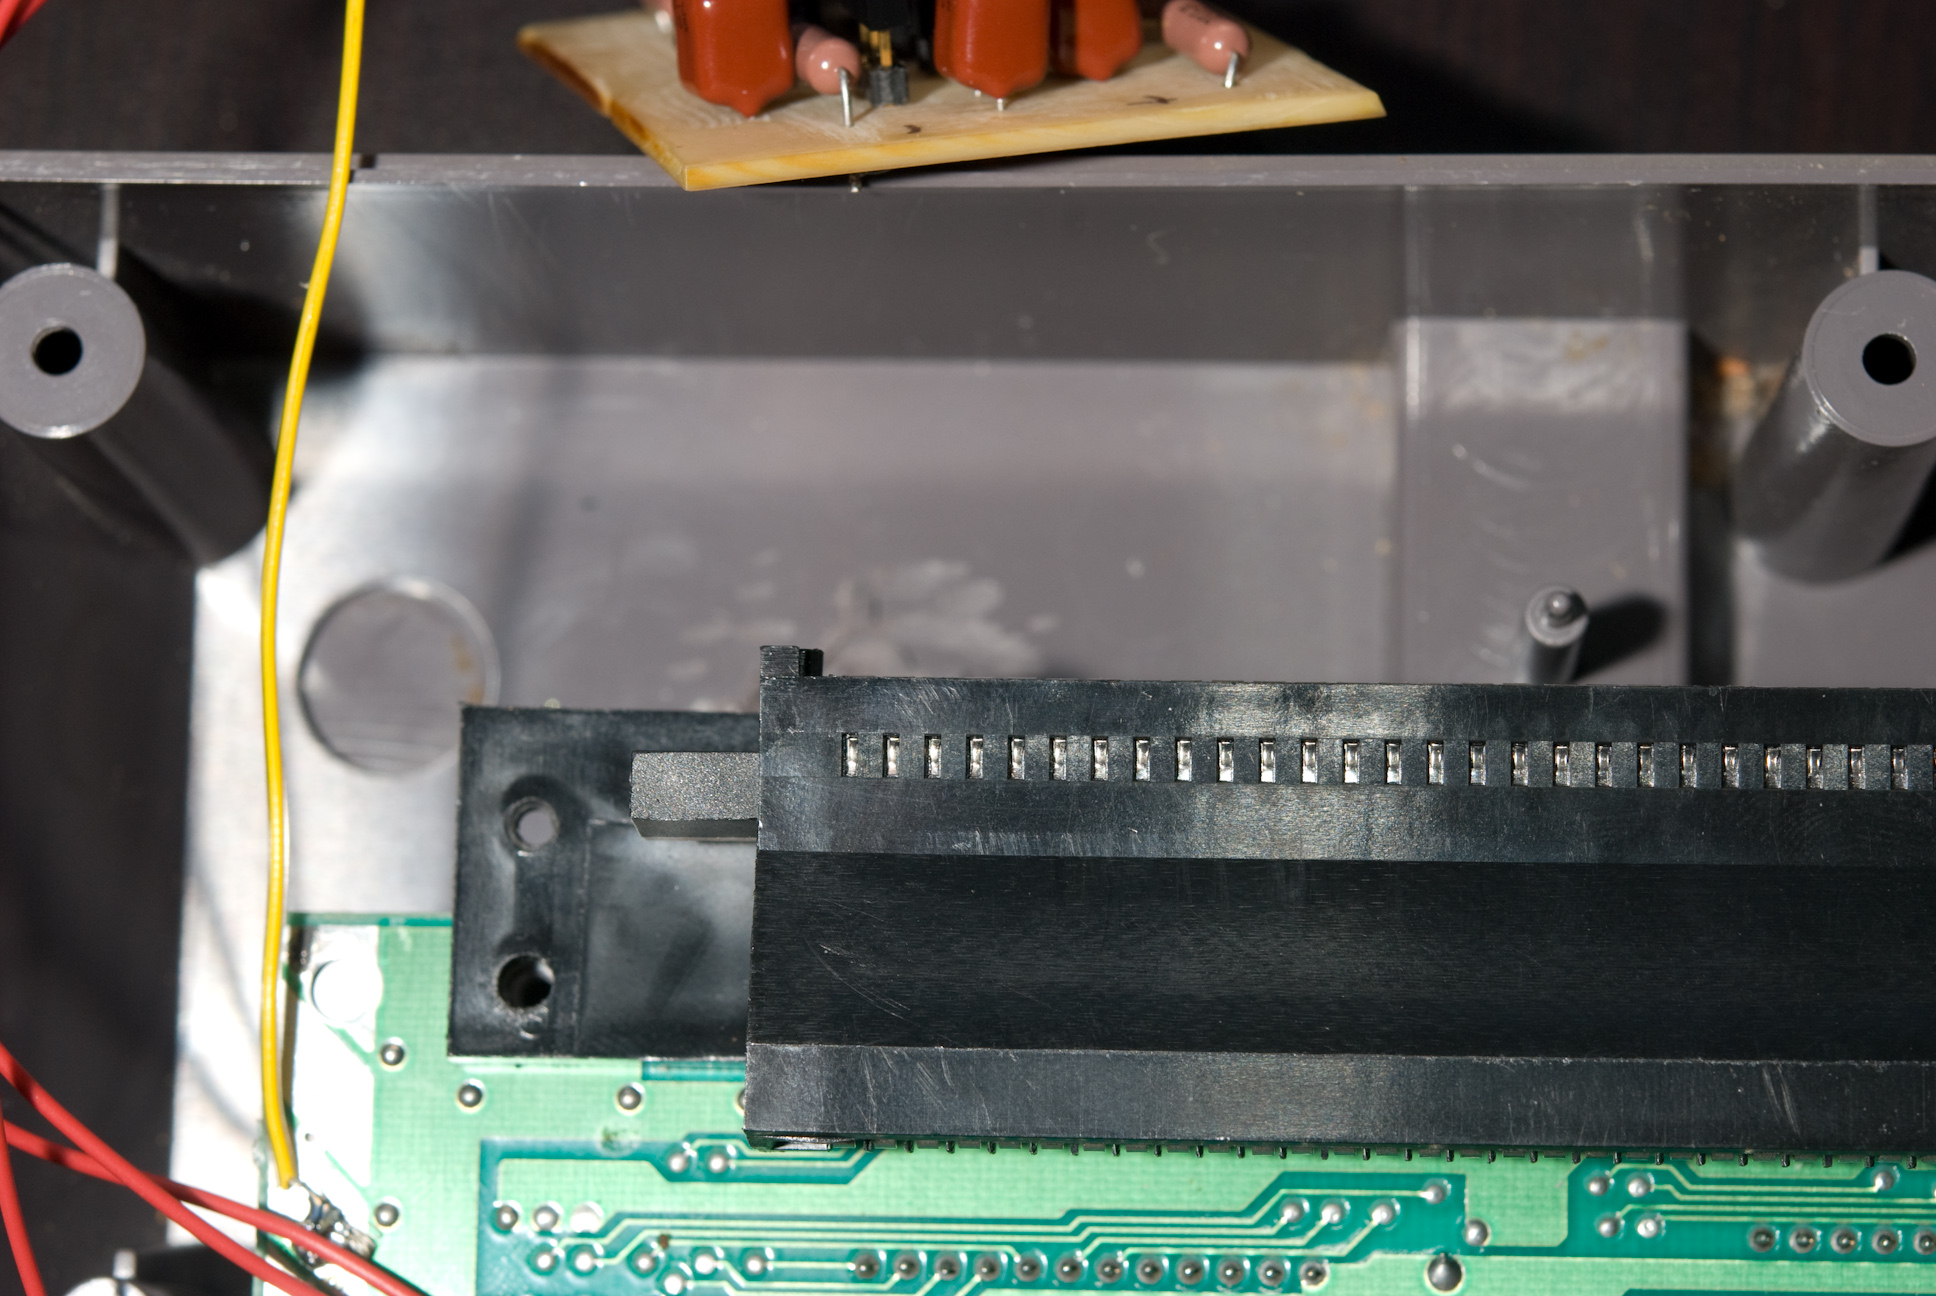
Tapping the Audio
Getting audio from the 2A03 is done by tapping pins 1 and 2. These are the ones whose output feeds into resistors. I recommend tapping off the input of the resistors instead of the CPU pins directly. For the PowerPak, use pin 9 from the expansion port along with a 47k resistor. The resistor value is typical when mixing the PowerPak audio in with the standard NES out – I found that 47k makes the output unbalanced, but since I am recording the audio to individual channels in my DAW anyway, it’s not a big deal for me.
The op-amp needs a ground reference so I just used the metal strip on the left-hand side of the NES motherboard since that whole strip is tied to GND. Just solder a wire flat onto part of the strip is all that need be done.
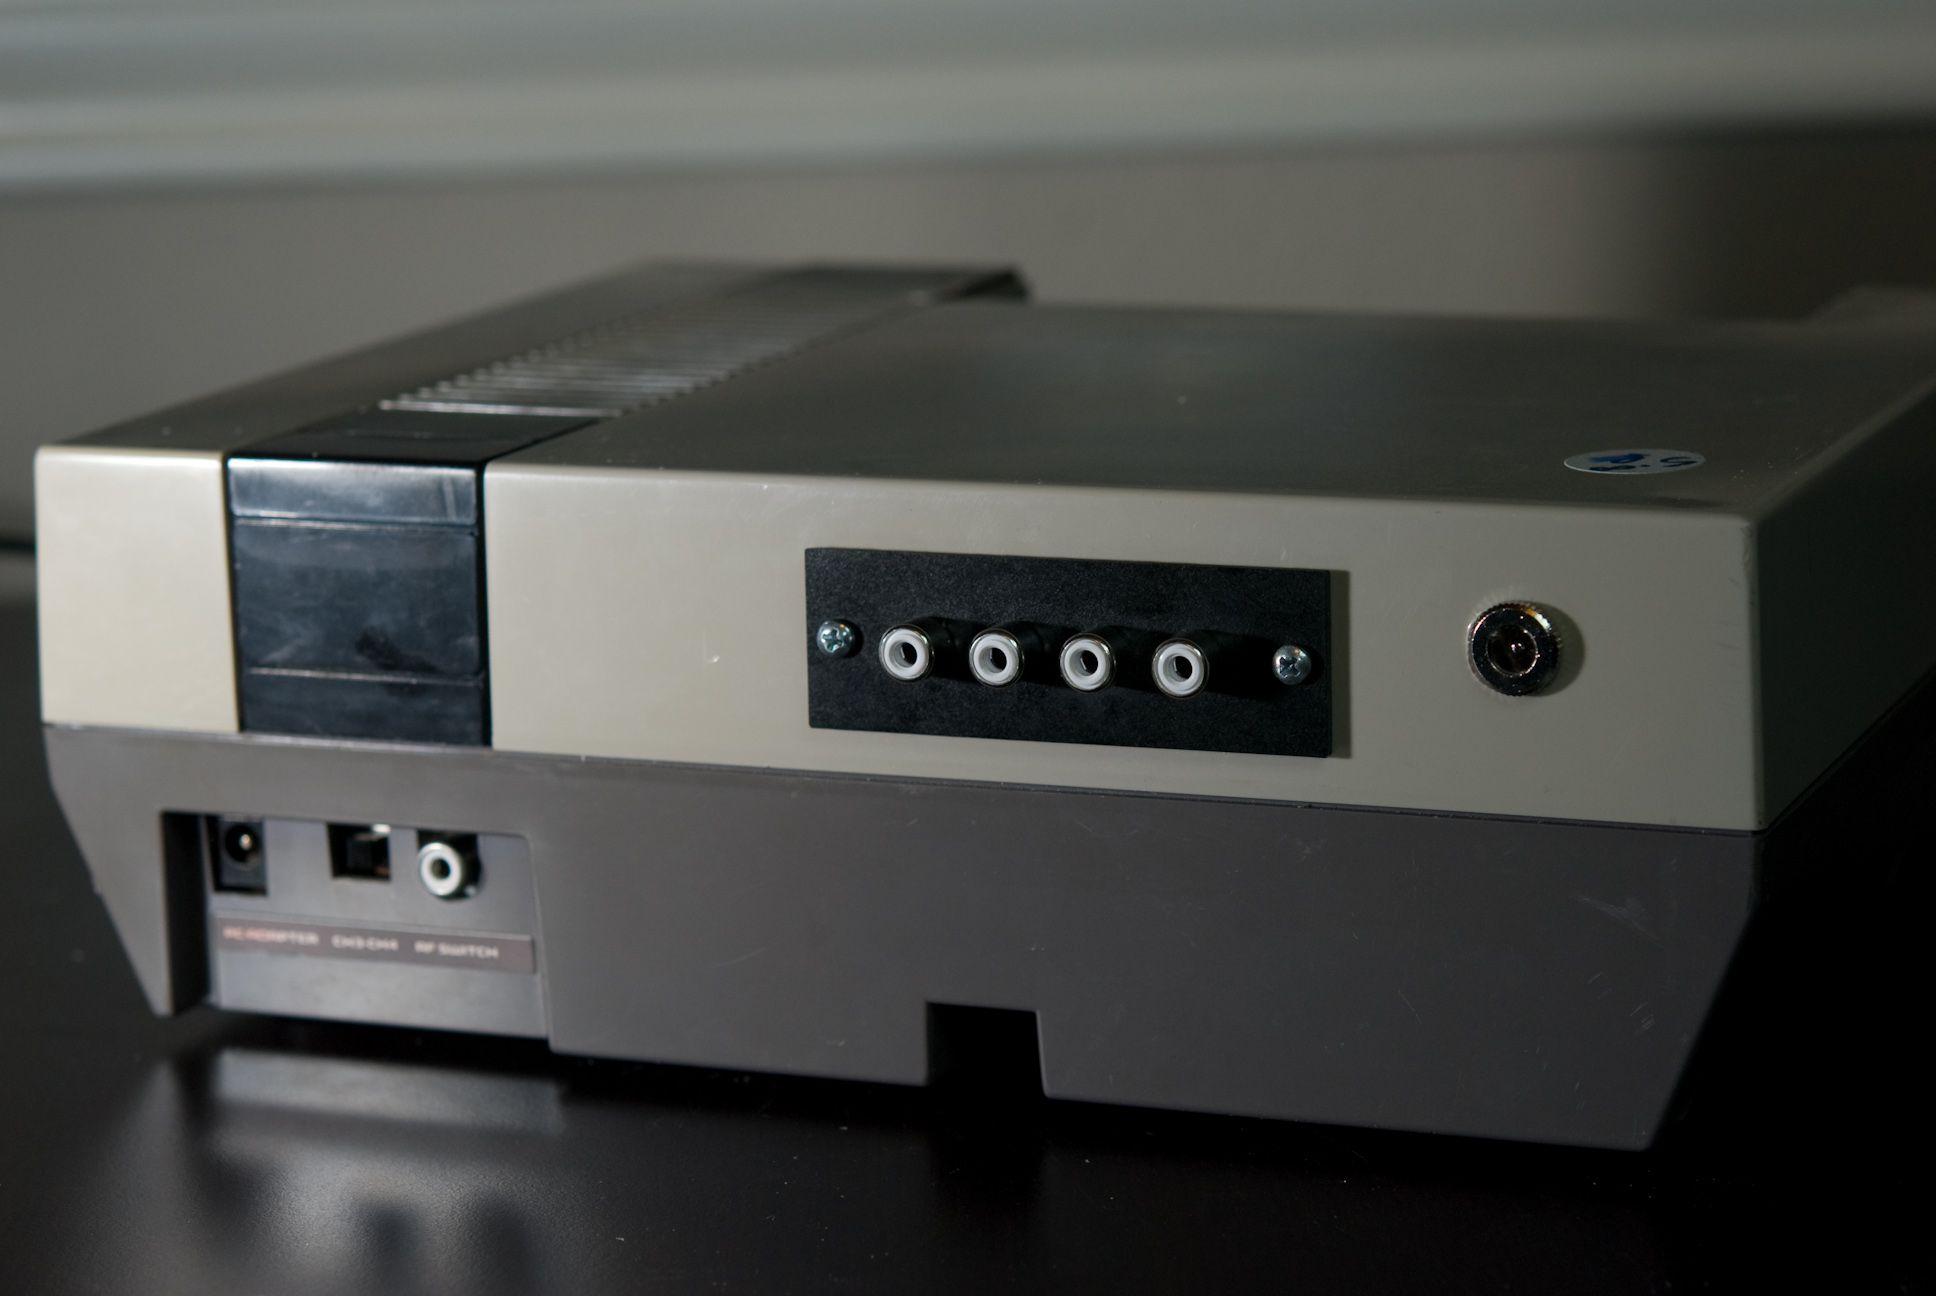
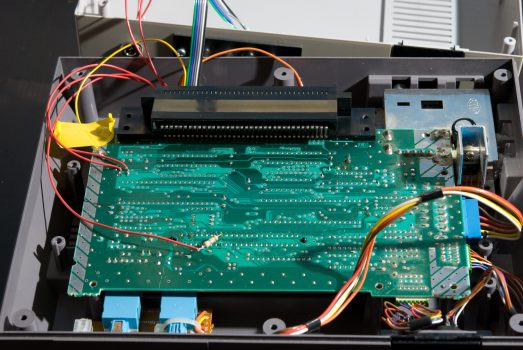
NES Case Mods
To fit the NESA board inside the NES, I had to cut one of the posts used for the top metal shield. The board fits under the back of the 72-pin connector. By bending the power caps, it might be possible to fit it in without cutting the post, however. I also cut a hole for the 4x Phono plate I found at Radio Shack as well as the additional power jack for the NESA. I used a 4x Phono plate over individual jacks because I could not find a 3x plate (though they probably exist) and didn’t want to mount individual phono plugs (I thought that would look less cool). I also had to cut some of the support plastic bits on the top of the case to get things to fit. It’s fairly easy to do with a Dremmel. I had a ton of extra screws, nuts and, and washers from my MB-6582 project so I used those to fix the phono plate.
Gallery